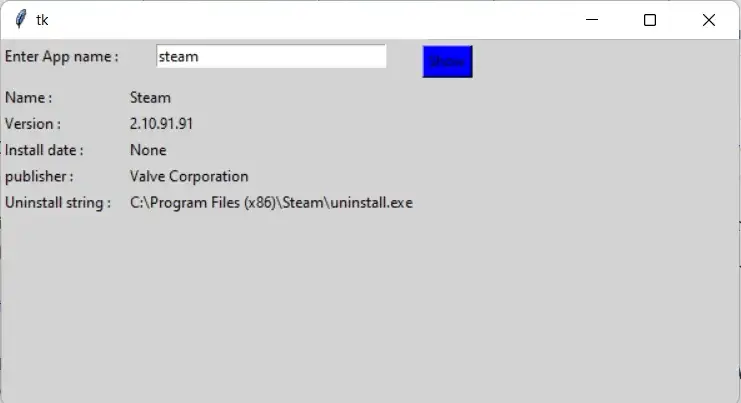
winapps is a Python library that enables us to manage installed applications on Windows operating system. So, in this tutorial, we will use Python winapps module to create an app that allows us to search installed apps on a computer.
pip install winapps
# import modules
from tkinter import *
import winapps

# function to attach output
def app():

  for item in winapps.search_installed(e.get()):
    name.set(item.name)
    version.set(item.version)
    Install_date.set(item.install_date)
    publisher.set(item.publisher)
    uninstall_string.set(item.uninstall_string)


# object of tkinter
# and background set for grey
master = Tk()
master.configure(bg='light grey')

# Variable Classes in tkinter
name = StringVar()
version = StringVar()
Install_date = StringVar()
publisher = StringVar()
uninstall_string = StringVar()


# Creating label for each information
# name using widget Label
Label(master, text="Enter App name : ",
  bg="light grey").grid(row=0, sticky=W)
Label(master, text="Name : ",
  bg="light grey").grid(row=2, sticky=W)
Label(master, text="Version :",
  bg="light grey").grid(row=3, sticky=W)
Label(master, text="Install date :",
  bg="light grey").grid(row=4, sticky=W)
Label(master, text="publisher :",
  bg="light grey").grid(row=5, sticky=W)
Label(master, text="Uninstall string :",
  bg="light grey").grid(row=6, sticky=W)


# Creating label for class variable
# name using widget Entry
Label(master, text="", textvariable=name,
  bg="light grey").grid(row=2, column=1, sticky=W)
Label(master, text="", textvariable=version,
  bg="light grey").grid(row=3, column=1, sticky=W)
Label(master, text="", textvariable=Install_date,
  bg="light grey").grid(row=4, column=1, sticky=W)
Label(master, text="", textvariable=publisher,
  bg="light grey").grid(row=5, column=1, sticky=W)
Label(master, text="", textvariable=uninstall_string,
  bg="light grey").grid(row=6, column=1, sticky=W)


e = Entry(master, width=30)
e.grid(row=0, column=1)

# creating a button using the widget
b = Button(master, text="Show", command=app, bg="Blue")
b.grid(row=0, column=2, columnspan=2, rowspan=2, padx=5, pady=5,)

mainloop()If you have been searching for the right note-taking or knowledge management app, you have…
Looking for AnyType alternatives? You're not alone. AnyType has gained popularity as a privacy-focused, local-first…
Notion is a popular all-in-one workspace, but many users seek alternatives for different needs (free…
Logseq is a beloved tool in the personal knowledge management (PKM) community. It's free, open-source,…
Looking for a Webshare alternative? You're not alone. Webshare is a popular proxy service with…
Docker changed software development forever. It made containers accessible, gave developers a simple workflow, and…