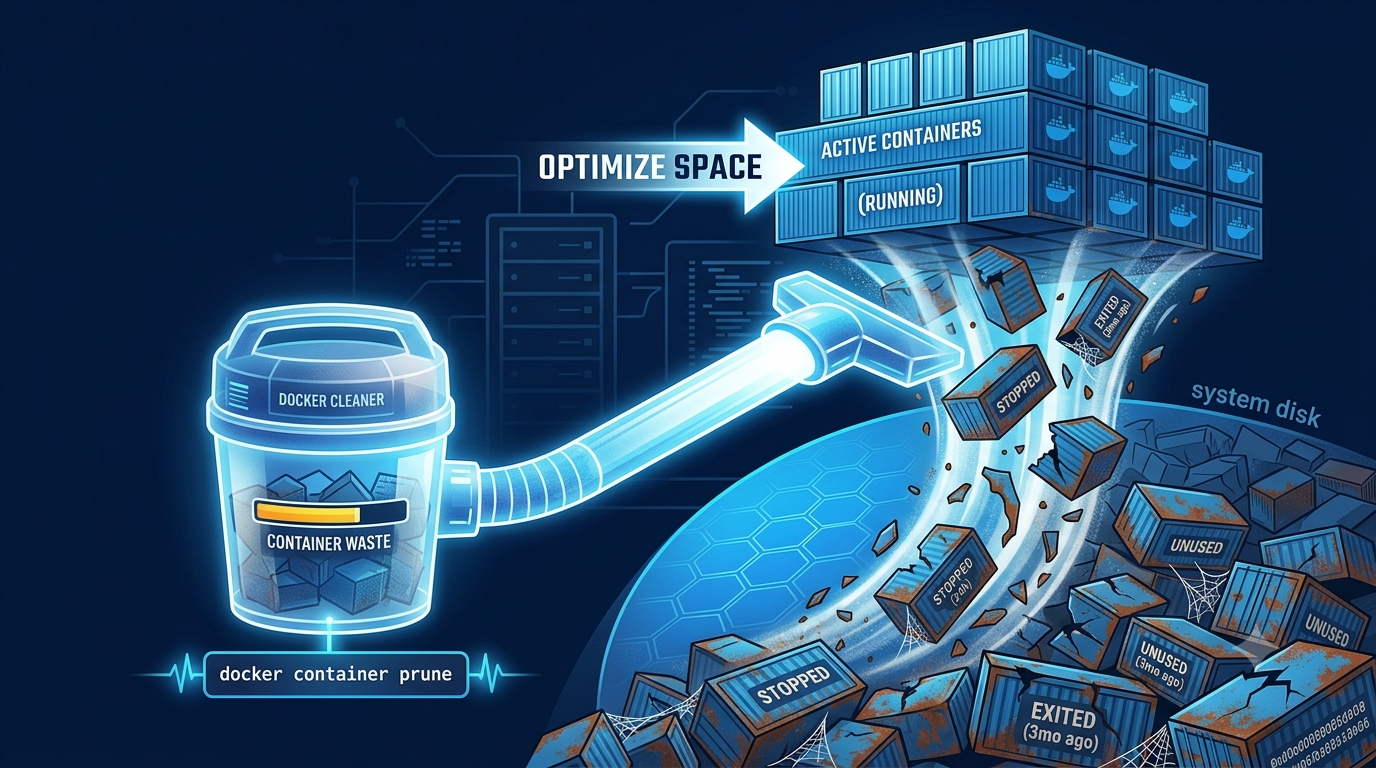
Docker makes it easy to spin up containers. The problem? Those containers pile up fast. Stopped containers, exited test environments, leftover CI/CD runners — they all stay on disk until you remove them manually.
Over time, old containers consume gigabytes of storage, clutter your docker ps -a output, and slow down your workflow. This guide shows you every method to identify and delete old Docker containers — from removing a single container to automating cleanup on a schedule.
Every Docker container — even a stopped one — holds data on disk. It keeps a writable layer, metadata, and log files. These do not disappear when the container stops.
Here is what happens when you ignore container cleanup:
Disk space fills up. Hundreds of stopped containers can easily consume multiple gigabytes. On CI/CD servers that run dozens of jobs per day, this becomes a serious issue within weeks.
Commands get slow. Running docker ps -a with thousands of entries takes longer and makes it hard to find what you actually need.
Confusion in production. Old containers with similar names or images make it easy to mistake a stale container for an active one.
Network and volume conflicts. Stale containers can hold onto network configurations or volumes, causing conflicts when you try to create new ones.
Regular cleanup is essential — especially if you do heavy testing, run CI pipelines, or use short-lived containers in development.
Before you delete anything, always check what exists. Use this command:
docker ps -a
The -a flag shows all containers — not just running ones. Without it, you only see active containers.
The output looks like this:
CONTAINER ID   IMAGE         COMMAND         CREATED        STATUS                    NAMES
3f4d2a9c1b7e   nginx         "nginx -g..."   2 days ago     Exited (0) 2 days ago     webserver
a8b1c2d3e4f5   ubuntu        "/bin/bash"     5 days ago     Exited (0) 5 days ago     test-env
c9d0e1f2a3b4   postgres:14   "docker-en..."  1 week ago     Exited (1) 6 days ago     db-old
Focus on the STATUS column. Any container showing Exited or Created is not running and is safe to remove — assuming you no longer need it.
To list only stopped containers:
docker ps -a --filter "status=exited"
To list only their IDs (useful for scripting):
docker ps -a --filter "status=exited" -q
The -q flag returns only container IDs with no extra formatting.
Use docker rm followed by the container ID or name:
docker rm <container_id>
Or by name:
docker rm webserver
You can use a partial container ID too. As long as it’s unique on your system, Docker accepts it:
docker rm 3f4d
The container must be stopped before you can remove it. If it is still running, Docker returns an error:
Error response from daemon: You cannot remove a running container 3f4d...
Stop the container before attempting removal or force remove
Stop the container first, then remove it:
docker stop <container_id>
docker rm <container_id>
Or combine them in one line:
docker stop <container_id> && docker rm <container_id>
Both docker rm and docker container rm work identically. The latter is the newer syntax:
docker container rm <container_id>
You can pass multiple container IDs or names to a single docker rm command:
docker rm container1 container2 container3
Or use their IDs:
docker rm 3f4d2a9c a8b1c2d3 c9d0e1f2
To remove all stopped containers in one command, use a subshell:
docker rm $(docker ps -a -q -f status=exited)
Breaking this down:
docker ps -a -q returns all container IDs-f status=exited filters to only exited containersdocker rm removes everything in that listWarning: Always verify the list before running this. Add
echobeforedocker rmto preview the IDs without deleting anything.
The cleanest way to remove all stopped containers is with docker container prune:
docker container prune
Docker asks for confirmation:
WARNING! This will remove all stopped containers.
Are you sure you want to continue? [y/N]
Press y to proceed. Docker removes every container with a status of exited or created.
To skip the confirmation prompt (useful in scripts):
docker container prune -f
The -f or --force flag bypasses the interactive prompt.
This is one of the most commonly used Docker cleanup commands. It is fast, safe (it only touches stopped containers), and handles everything in one step.
Sometimes you do not want to remove every stopped container. You might want to keep recent ones for debugging while cleaning up old ones.
Docker supports filtering by time using the --filter flag.
Remove containers older than 24 hours:
docker container prune --filter "until=24h"
Remove containers older than 48 hours:
docker container prune --filter "until=48h"
Remove containers older than 7 days:
docker container prune --filter "until=168h"
The until filter accepts duration values in hours (h), minutes (m), and seconds (s).
You can also filter by label. If your containers use labels, this becomes very powerful:
docker container prune --filter "label=env=staging"
Remove exited containers older than 24 hours using xargs:
docker ps -a --filter "status=exited" --filter "until=24h" -q | xargs docker rm
This approach gives you fine-grained control. You pick exactly which containers to target before anything gets deleted.
Preview before you delete. Always test your filter with docker ps -a first:
docker ps -a --filter "status=exited" --filter "until=24h"
Confirm the list looks right, then run the removal.
Sometimes you need to remove a container that is still running. Use the --force or -f flag with docker rm:
docker rm -f <container_id>
This sends a SIGKILL to the container, stops it immediately, and removes it. There is no graceful shutdown.
Use force removal carefully. If the container is writing to a database, processing a transaction, or managing important state, killing it abruptly can corrupt data.
The safer approach:
docker stop <container_id>docker rm <container_id>docker stop sends SIGTERM first, which lets the process shut down cleanly before Docker sends SIGKILL after a timeout.
Force-remove a list of running containers:
docker rm -f $(docker ps -q)
docker ps -qwithout-areturns only running containers.
docker system prune removes multiple types of unused resources in one command:
docker system prune
By default, it removes:
Docker shows you exactly what it will remove and asks for confirmation:
WARNING! This will remove:
  - all stopped containers
  - all networks not used by at least one container
  - all dangling images
  - all build cache

Are you sure you want to continue? [y/N]
To include unused volumes as well:
docker system prune --volumes
To skip the confirmation:
docker system prune -f
To remove everything including unused images (not just dangling):
docker system prune -a
Warning:
docker system prune -aremoves all images not currently used by a running container. This can be very destructive. You may need to re-pull large images afterward.
Use docker system prune when you want a fresh environment. It is a common step after finishing a project, cleaning a CI machine, or reclaiming disk space quickly.
If you know a container is temporary and you will not need it after it stops, tell Docker to remove it automatically:
docker run --rm image_name
The --rm flag instructs Docker to delete the container as soon as it exits. You get a clean environment every time without any manual cleanup.
This works great for:
docker run --rm ubuntu:22.04 echo "Hello from a clean container"
After the command runs, the container is gone. No leftover entries in docker ps -a.
Note: You cannot use
--rmwith detached mode (-d) in older Docker versions. In modern Docker,--rmwith-dworks, and the container is removed when it stops.
Manual cleanup does not scale. If you manage a development server, CI machine, or any environment that creates containers regularly, automate the cleanup.
The simplest approach is a scheduled cron job on your Linux or macOS host.
Open the crontab editor:
crontab -e
Add a line to run cleanup daily at 3 AM:
0 3 * * * /usr/bin/docker container prune -f >> /var/log/docker-cleanup.log 2>&1
For a weekly full prune:
0 3 * * 0 /usr/bin/docker system prune -f >> /var/log/docker-cleanup.log 2>&1
Always use the full path to
dockerin cron jobs. Runwhich dockerto find it.
For more control, write a script:
#!/bin/bash
# docker-cleanup.sh

# Remove containers stopped more than 24 hours ago
docker container prune --filter "until=24h" --force

# Remove unused images older than 7 days
docker image prune --all --filter "until=168h" --force

# Remove unused volumes
docker volume prune --force

# Remove unused networks
docker network prune --force

# Log the result
echo "$(date): Docker cleanup completed" >> /var/log/docker-cleanup.log
Make it executable:
chmod +x /usr/local/bin/docker-cleanup.sh
Schedule it with cron:
0 2 * * * /usr/local/bin/docker-cleanup.sh
When building an automated cleanup for the first time, always test with a dry run. For containers running longer than 12 hours:
docker ps --filter "status=running" --format "{{.ID}} {{.RunningFor}}" | \
  awk '($2 >= 12 && $3 ~ /hour/) || $3 ~ /month/ {print $1}'
Review the output. If it looks correct, pipe to xargs docker rm -f to execute.
For environments with heavy container churn, docker-gc-cron automates garbage collection with a configurable schedule:
docker run -d \
  -v /var/run/docker.sock:/var/run/docker.sock \
  -e CRON="0 */6 * * *" \
  clockworksoul/docker-gc-cron
This runs the cleanup every 6 hours. You can also enable dry runs with -e DRY_RUN=1 to test the configuration before committing to deletion.
Before cleaning up, it helps to see how much space Docker is actually consuming.
Run:
docker system df
Output:
TYPE            TOTAL     ACTIVE    SIZE      RECLAIMABLE
Images          12        5         3.2GB     2.1GB (65%)
Containers      45        3         890MB     880MB (98%)
Local Volumes   8         4         1.5GB     400MB (26%)
Build Cache     -         -         2.3GB     2.3GB
This shows you exactly how much space containers, images, volumes, and build cache use — and how much is reclaimable.
For a detailed breakdown:
docker system df -v
This lists individual containers, images, and volumes with their sizes. It is the fastest way to identify what is consuming the most space before you decide what to remove.
If you use Docker Compose, you have dedicated commands for cleanup.
Stop and remove containers defined in a compose file:
docker compose down
This stops all containers and removes them, along with the networks compose created.
Also remove volumes:
docker compose down -v
Also remove images built by compose:
docker compose down --rmi all
Remove only stopped containers without touching volumes or networks:
docker compose rm
You can also add a cleanup service directly in your docker-compose.yml for CI pipelines:
services:
  app:
    image: my-app
    command: run-tests

  cleanup:
    image: docker:cli
    volumes:
      - /var/run/docker.sock:/var/run/docker.sock
    command: docker container prune -f
    depends_on:
      - app
This approach ensures cleanup runs automatically after your application service finishes.
Error response from daemon: You cannot remove a running container abc123...
Fix: Stop the container first, then remove it.
docker stop abc123 && docker rm abc123
Or force-remove it:
docker rm -f abc123
Error: No such container: mycontainer
Fix: The container name or ID does not exist. Double-check with docker ps -a and confirm the exact ID or name.
Got permission denied while trying to connect to the Docker daemon socket
Fix: Add your user to the docker group, or run with sudo:
sudo usermod -aG docker $USER
Log out and log back in for the change to take effect.
If a volume is in use, Docker refuses to remove it. Check which containers use it:
docker ps -a --filter "volume=my_volume"
Remove those containers first, then remove the volume.
If your filter returns no containers, xargs docker rm errors out on an empty input. Fix it with the -r flag:
docker ps -a -q --filter "status=exited" | xargs -r docker rm
The -r flag tells xargs not to run if the input is empty.
Cleaning up old containers is reactive. These practices help you stay ahead of the clutter.
Always use --rm for temporary containers. Any container you create for a one-off task should have --rm. This removes the guesswork later.
Name your containers explicitly. Use --name when you create containers. docker rm webserver-v2-staging is far easier than hunting for a random ID.
docker run --name webserver-v2 nginx
Verify before you delete. Run docker ps -a --filter to see what your filter matches before piping to docker rm. It takes 5 seconds and prevents mistakes.
Avoid docker system prune -a in production. This removes all images not tied to a running container. On a production server, that means re-pulling every image next deployment. Use targeted commands instead.
Test cleanup commands in staging first. Before running any prune or bulk removal on a production host, validate the command in a staging or test environment.
Log your automated cleanups. When you schedule cron-based cleanup, always redirect output to a log file. If something gets deleted unexpectedly, you have a record.
0 3 * * * /usr/bin/docker container prune -f >> /var/log/docker-cleanup.log 2>&1
Remove volumes explicitly when needed. Docker does not remove volumes when you remove a container. If you want the volume gone too:
docker rm -v <container_id>
The -v flag removes any anonymous volumes attached to the container. Named volumes are not deleted this way — you must remove them with docker volume rm.
Use labels for organized cleanup. Tag containers with labels at creation time:
docker run --label "env=dev" --label "project=myapp" nginx
Then prune by label:
docker container prune --filter "label=env=dev"
This gives you precise control over which containers get cleaned up.
Set up a regular cleanup schedule. For any server that runs containers regularly, a daily or weekly docker container prune -f cron job keeps disk usage under control without any manual effort.
| Task | Command |
|---|---|
| List all containers | docker ps -a |
| List stopped containers | docker ps -a -f status=exited |
| Remove a single container | docker rm <id_or_name> |
| Remove multiple containers | docker rm id1 id2 id3 |
| Remove all stopped containers | docker container prune |
| Remove stopped containers (no prompt) | docker container prune -f |
| Remove containers older than 24h | docker container prune --filter "until=24h" |
| Force-remove a running container | docker rm -f <id_or_name> |
| Remove all stopped containers + more | docker system prune |
| Auto-remove container on exit | docker run --rm image_name |
| Check disk usage | docker system df |
| Stop + remove via compose | docker compose down |
Keep this table handy. These are the most useful Docker container cleanup commands in one place.
| Task | Command |
|---|---|
| List all containers | docker ps -a |
| List only stopped containers | docker ps -a -f status=exited |
| List container IDs only | docker ps -a -q |
| Remove a single container | docker rm <id_or_name> |
| Remove multiple containers | docker rm id1 id2 id3 |
| Remove all stopped containers | docker container prune |
| Remove stopped containers (no prompt) | docker container prune -f |
| Remove containers older than 24h | docker container prune --filter "until=24h" |
| Force-remove a running container | docker rm -f <id_or_name> |
| Remove container and its volumes | docker rm -v <id_or_name> |
| Remove all stopped containers and more | docker system prune |
| Remove everything including images | docker system prune -a |
| Auto-remove container on exit | docker run --rm image_name |
| Check total disk usage | docker system df |
| Detailed disk breakdown | docker system df -v |
| Stop and remove via Compose | docker compose down |
| Stop, remove containers and volumes | docker compose down -v |
The commands in this guide work on Linux, macOS, and Windows — but there are a few platform-specific notes.
PowerShell does not support Unix-style command substitution with $() the same way bash does. Use this syntax instead for bulk removal:
docker ps -a -q --filter "status=exited" | ForEach-Object { docker rm $_ }
Or use the prune commands directly — they work identically on all platforms:
docker container prune -f
docker system prune -f
On Windows, Docker Desktop also provides a graphical interface where you can see and delete containers from the Containers tab without using the CLI at all. This is useful for quick one-off removals.
On macOS with Docker Desktop, the commands are identical to Linux. The main difference is the Docker daemon runs inside a lightweight virtual machine rather than natively. This means disk space reclamation works slightly differently — Docker Desktop manages the VM disk image, and running docker system prune inside the VM frees space within it.
If you notice Docker Desktop still consuming a lot of disk after pruning, you may need to go to Docker Desktop > Settings > Resources > Disk and reduce the disk image size limit, then restart Docker Desktop.
All commands in this guide work natively on Linux. Cron job automation is straightforward and well-supported. For user permissions, always ensure your user is in the docker group to avoid running cleanup scripts with sudo in cron.
Understanding container states helps you make smarter decisions about what to remove.
Docker containers move through several lifecycle states:
Created — The container has been created but never started. It was created with docker create rather than docker run. It occupies minimal disk space but shows up in docker ps -a.
Running — The container is actively running. You cannot remove it without --force unless you stop it first.
Paused — The container’s processes are suspended. The container is not actively using CPU but still occupies memory and disk.
Restarting — Docker is in the process of restarting the container due to a restart policy.
Exited — The container ran and stopped. The exit code tells you whether it stopped cleanly (0) or with an error (any non-zero value). Most cleanup targets are in this state.
Dead — Docker tried to remove the container but failed. This state usually indicates a problem with the storage driver or filesystem. You may need to investigate and resolve the underlying issue before the container can be removed.
To filter containers by state:
# Only exited containers
docker ps -a --filter "status=exited"

# Only created (never started) containers
docker ps -a --filter "status=created"

# Only dead containers
docker ps -a --filter "status=dead"
Targeting specific states lets you clean up precisely without accidentally affecting containers in other stages of their lifecycle.
Removing containers does not remove the images they were built from. After you clean up containers, you likely have orphaned or outdated images sitting on disk too.
List all images:
docker images -a
Remove a specific image:
docker rmi <image_id_or_name>
Remove all dangling images (images with no tag, not referenced by any container):
docker image prune
Remove all unused images (not just dangling ones):
docker image prune -a
Remove images older than 7 days:
docker image prune -a --filter "until=168h"
The typical cleanup order is:
docker container prune)docker image prune -a)docker volume prune)docker network prune)Or do all at once with docker system prune -a --volumes.
Why this order matters: You cannot remove an image if a container (even a stopped one) references it. Containers must go first.
CI/CD environments are the biggest producers of container clutter. Every build, test run, and deployment can leave behind stopped containers. Without cleanup steps, build servers run out of disk space within days.
In GitHub Actions:
- name: Clean up Docker containers
  run: docker container prune -f

- name: Clean up unused images
  run: docker image prune -f
In GitLab CI:
after_script:
  - docker container prune -f
  - docker image prune -f
In Jenkins (Declarative Pipeline):
post {
  always {
    sh 'docker container prune -f'
    sh 'docker image prune -f'
  }
}
Whenever your CI pipeline runs containers for testing or building, add --rm:
docker run --rm my-test-image npm test
docker run --rm my-build-image make build
This eliminates cleanup work entirely for those containers.
If multiple pipelines share a single Docker host, one-off --rm flags are not enough. Schedule a nightly docker system prune -f on the host to catch anything that slipped through:
0 2 * * * /usr/bin/docker system prune -f >> /var/log/docker-cleanup.log 2>&1
By default, removing a container does not remove its associated volumes. This is intentional — Docker protects your data. But it means volumes accumulate over time.
Remove a container and its anonymous volumes at the same time:
docker rm -v <container_id>
The -v flag only removes anonymous volumes (those not given a name at creation). Named volumes are always preserved unless you explicitly remove them.
List all volumes:
docker volume ls
Remove a specific named volume:
docker volume rm my_volume
Remove all unused volumes:
docker volume prune
Remove all unused volumes without a confirmation prompt:
docker volume prune -f
Warning: Volumes can contain databases, configuration files, uploaded files, and other critical data. Always verify a volume is safe to remove before deleting it. Use
docker volume inspect <volume_name>to see what containers use it and where the data is stored.
Find which container a volume belongs to:
docker ps -a --filter "volume=my_volume"
Unused Docker networks do not consume significant disk space, but they do create iptables rules, bridge network devices, and routing table entries. These add noise and can occasionally cause conflicts.
List all networks:
docker network ls
Remove a specific network:
docker network rm my_network
Remove all unused networks:
docker network prune
Docker only removes networks that no active container uses. Running containers keep their networks intact.
Remove unused networks without a prompt:
docker network prune -f
docker system prune handles networks automatically, so if you run full system cleanup you do not need to prune networks separately.
Production environments require extra caution. Accidentally removing an active container or a volume with live data can cause outages or data loss.
Follow these steps before removing any container in production:
Step 1: Identify the container fully.
docker inspect <container_id>
This shows the full configuration: image, volumes, environment variables, network settings, and restart policy. Confirm it is what you think it is.
Step 2: Check for critical volumes.
Look at the Mounts section in docker inspect output. If the container has named volumes attached, note them before removal. Decide whether you want to keep or remove those volumes.
Step 3: Verify no traffic is active.
Check your load balancer, health checks, or monitoring dashboards. Confirm no live traffic routes to this container.
Step 4: Stop gracefully before removing.
docker stop <container_id>
Give the process time to finish open connections. The default stop timeout is 10 seconds. Increase it for slow-shutdown applications:
docker stop -t 30 <container_id>
Step 5: Remove the container.
docker rm <container_id>
Step 6: Clean up volumes if needed.
docker volume rm <volume_name>
Only after confirming the volume data is no longer needed or has been backed up.
Old Docker containers do not go away on their own. They sit on disk, take up space, and create clutter. Fortunately, Docker gives you everything you need to clean them up.
For a single container, docker rm is all you need. For bulk cleanup, docker container prune removes every stopped container quickly. For older containers specifically, use the --filter "until=Xh" option to target by age. For a full reset, docker system prune clears containers, images, networks, and build cache in one shot.
Use --rm whenever you spin up a temporary container so it disappears automatically on exit.
Name your containers with --name so management and removal are straightforward.
Automate cleanup with a cron job that runs docker container prune -f on a schedule. Log the output so you have an audit trail.
In production, always stop containers gracefully, inspect volumes before removal, and verify no active traffic before taking anything down.
In CI/CD, add docker container prune -f and docker image prune -f to your pipeline’s post-build steps. Use --rm on every short-lived test or build container.
Docker gives you precise tools for every scenario — from removing one container by name to pruning entire environments with a single command. Use them consistently, build the habit of regular cleanup, and your Docker environments will stay fast, lean, and easy to manage.
Does removing a Docker container delete the image? No. Removing a container only deletes that container’s writable layer and metadata. The image it was built from stays on disk. Use docker image prune or docker rmi to remove images separately.
Does docker container prune remove running containers? No. docker container prune only removes stopped containers. Running containers are always left untouched.
What happens to data in a container when I remove it? Any data written directly inside the container’s filesystem is lost when the container is removed. Data stored in volumes or bind mounts is not affected — it persists on the host.
How do I remove a container by name? Use docker rm <container_name> exactly as you would with an ID. Container names must be unique on a host, so this always targets the right container.
Can I recover a deleted Docker container? No. Once a container is removed, its data is gone. There is no built-in undo. Always back up critical data from volumes before removing containers.
What is the difference between docker rm and docker container rm? They are identical. docker container rm is the newer, more explicit syntax introduced in Docker 1.13. Both commands accept the same options and produce the same result.
How often should I run Docker cleanup? It depends on your workload. Development machines doing heavy testing benefit from daily cleanup. Production servers with stable containers may only need weekly or monthly cleanup. CI/CD build servers should run cleanup after every build or at least nightly.
If you have been searching for the right note-taking or knowledge management app, you have…
Looking for AnyType alternatives? You're not alone. AnyType has gained popularity as a privacy-focused, local-first…
Notion is a popular all-in-one workspace, but many users seek alternatives for different needs (free…
Logseq is a beloved tool in the personal knowledge management (PKM) community. It's free, open-source,…
Looking for a Webshare alternative? You're not alone. Webshare is a popular proxy service with…
Docker changed software development forever. It made containers accessible, gave developers a simple workflow, and…